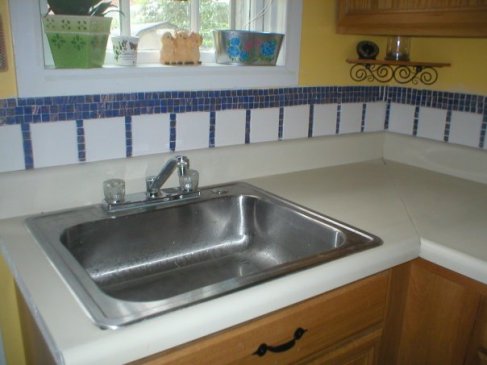
One day, my neighbor (gotta love him) offered me some free tiles. He had just finished a project of his own and had extra tile he didn’t plan on using. Of course I can never turn anything “free” down, so I happily accepted them and thanked him graciously. Of course at the time, I had no idea what I was going to do with them. I always wanted a kitchen backsplash, but I had never worked with tile before. He had more faith I could do it than I had in myself. He told me it was a relatively easy project to do. My neighbor had suggested that I buy the adhesive and grout in one. It worked out great and was simple to use. The tiles my neighbor gifted to me were plain white. I wanted to add more color, so I went to Home Depot, and purchased smaller blue mosaic tiles. I laugh at this now, but I had no idea I could cut and glue and apply them on the mesh sheet they come on. So, yes (are you ready to laugh at me and learn from my rookie mistake?) I took every tile off and applied them individually! This took forever and I wish I knew then what I knew now… It would have cut the project time in half! It also would have been easier to measure and keep the tile from being applied crooked. I had to fight to keep it straight. You live and you learn! I used a tiling trowel to spread out the grout adhesive. I them applied the tiles. I used the same mixture to grout the tiles and fill in the spaces in between. Luckily, I didn’t need a tile cutter, which was a good thing, because I didn’t buy one! Did it come out perfect? No, but it wasn’t terrible and gave me the confidence to try other things. So I would say overall it was a success and cost under $50.00.
Since discovering Mod Podge I am thinking about decoupaging a few of the tiles to add more pop, but I just haven’t gotten around to it yet! If I do, I will be sure and share.


It’s great to see all your upcycling ideas! thanks
Row
LikeLike